UI Script Recorder
The UI Script Recorder is used to automate the Software Installation process. You can use UI Automation to deploy packages that does not support silent installation via command line. Or if you want to customize the Setup options via UI.
UI Script Recorder Reference
The UI Script Recorder is a part of the Install Application and Uninstall Application dialogs. To enable the UI Script Recorder select the UI Automation script option. Below is description of the Script Recorder elements.
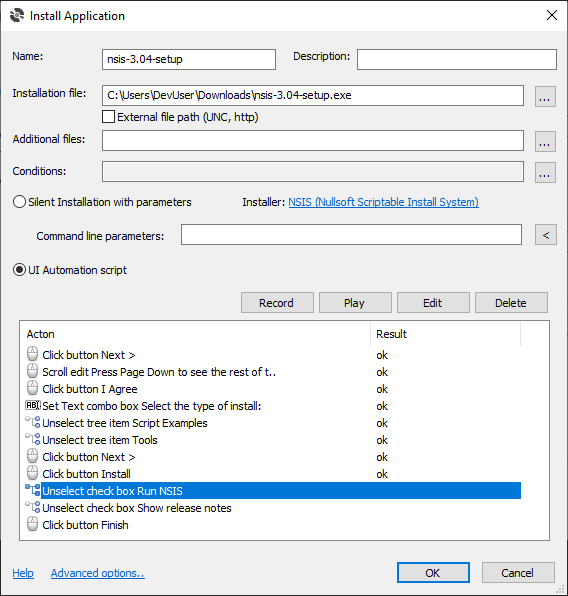
Record
Executes the specified installation file and initiates the Recording session. If an installation already started, the Recording session will be continued.
Play
Executes the speciefed installation file and Plays the recorded script.
Note!
The Command line parameters will be used to launch the process. If the parameters is not required leave this field empty.
Edit
Opens the UI Script Action Dialog to edit the selected script action.
Delete
Deletes the selected script action.
UI Script Action Dialog
Below is description of the UI Script Action Dialog elements.
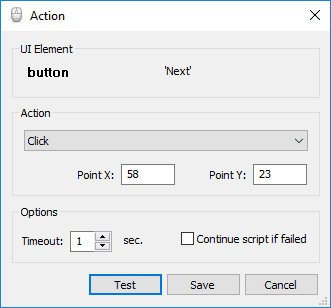
UI Element
Displays the UI Element name and text selected for the action.
Action
The drop-down list to choosing the Action for the UI Element. The action list may contain only supported by the UI Element actions. The options for the selected action are displayed below the action list.
Timeout
Defines the Wait Timeout before the Action. It specifies the timeout in seconds to wait for completion prior Applications installation steps.
Ignore failure
Ignore failure of the Action and coninue the UI script.
Test
Executes the action for UI Element.
Save
Saves the changes or adds a new Action to the Script and closes the Dialog.
Note!
All Functionality of the UI Script Action Dialog can be accessible only during the Recording session. In the Edit mode you can not change the Action type.
Record the UI Automation Script
This is a basic tutorial on how to use the UI Script Recorder.
- Create a New Package
- In the Package panel click Button Add.. and select the Install Application from menu.
- In the Install Application Dialog specify the Installation File and select the UI Automation Script option.
- Click Record. The Installation File will be executed and the Recording session will be started.
- Use the Mouse to choose an UI Element for action, then use Ctrl + Mouse Click to select the UI Element.
- Once UI Element is selected, the UI Script Action Dialog will be appeared.
- It the Action drop-down list, select an Action for the UI Element. Set the Action parameters if needed.
- Click the Test button to ensure that UI Script Action is work properly.
- Click the Save to add Action to the Script. The New Action will be appeared in the Script Recorder dialog.
- Pass through all installation steps and close the Installer. The Recording session will be auto-ended once the Installation process complete.
- To test the recorded script click Play button.