How to enable HTTPS in Hv manager
Setup HV Manager HTTPS URL
Use hvm update-instance command to change the HV Manager webserver URL to HTTPS. In this example HTTPS URL is https://192.168.0.114:8117/.
hvm update-instance -name hvm -url https://192.168.0.114:8117/
Note!
Please make sure that the corresponding URL must be closed with "/".
Create Self Signed Server Certificate
Skip this step if you have trusted SSL certificates. *If your SSL certificate format differs from pfx, then you need to convert the type of the certificate to a pfx, this can be done from your SSL certificate provider or via a related program
If you do not have the trusted SSL certificate in the PowerShell console, type the following command (Replacing the 192.168.0.114 with DNS name or IP relevant to you).
New-SelfSignedCertificate -certstorelocation cert:\localmachine\my -dnsname "192.168.0.114"

You need to copy the thumbprint guid displayed as you will need this later. In the example above, the thumbprint is:
cf0f5a14b893bdf4f9a0d46b0ce137ba7109d59b
Export the Certificate as a .pfx
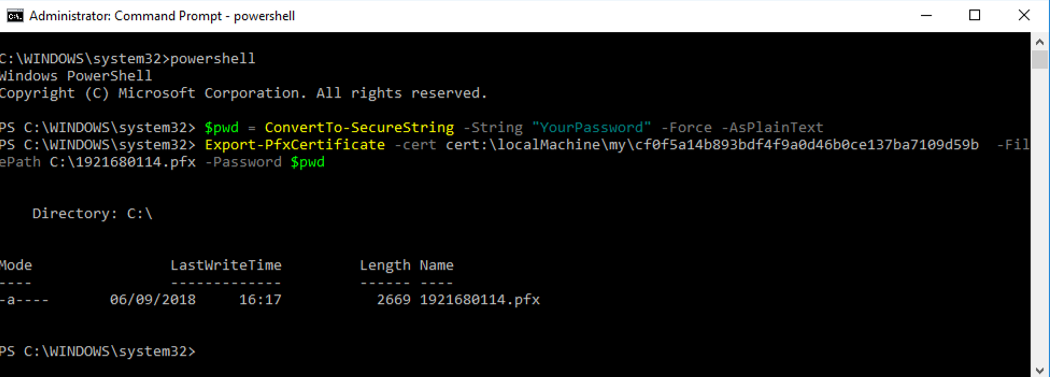
In order to install a created certificate on client computers, you need to export the cert as a pfx file. Use the following PowerShell commands:
$pwd = ConvertTo-SecureString -String "YourPassword" -Force -AsPlainText
Export-PfxCertificate -cert cert:\localMachine\my\cf0f5a14b893bdf4f9a0d46b0ce137ba7109d59b -FilePath C:\1921680114.pfx -Password $pwd
Get thumbprint for SSL binding to IP and port (only for trusted SSL certificates)
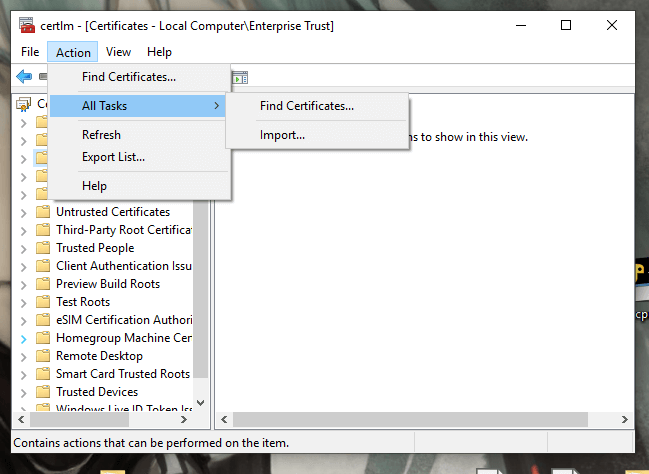
- Press win + r and enter certlm.msc, the certificate manager will be opened.
- Press “Action - All tasks - Import” buttons to import the certificate
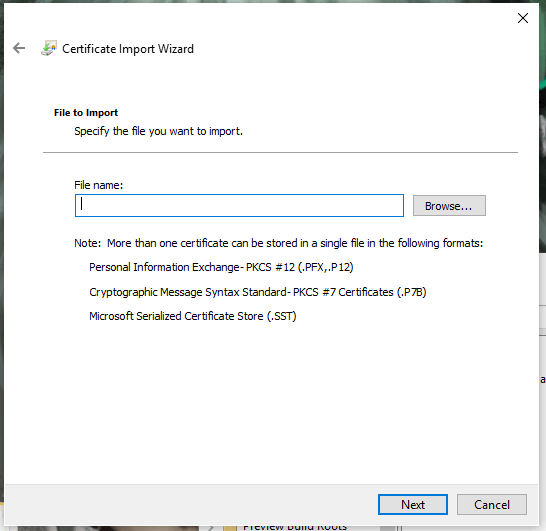
- Choose the certificate file from your computer and press “Next”
-
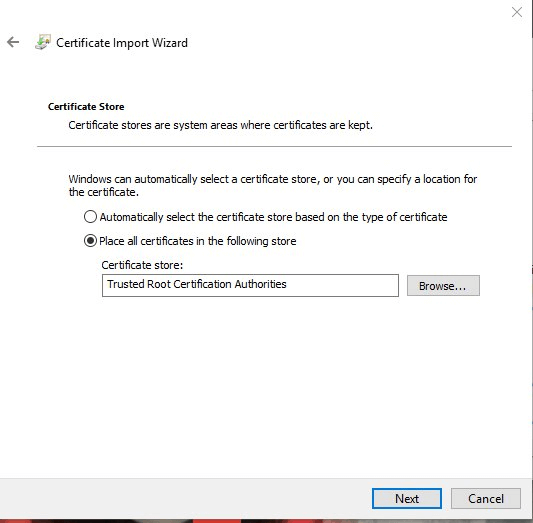
Choose the certificate store
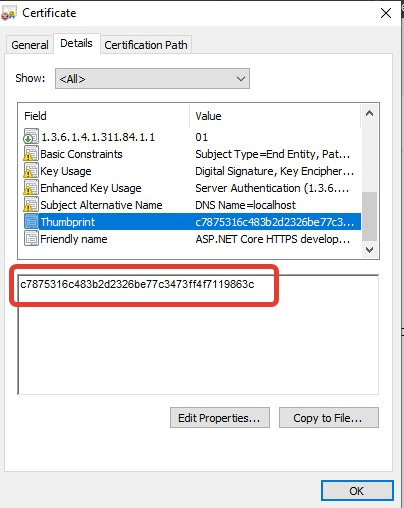
- After import find the required certificate, double-click on the required certificate, and open “Details”.
-
Copy the thumbprint and then follow the actions in the next section.
Bind an SSL certificate to a port number
Use the Windows Netsh.exe tool to bind SSL cert to a port number and IP (optionally). Appid option can be any GUID. The following example binds the certificate to the port 8117 and any IP address:
netsh http add sslcert ipport=0.0.0.0:8117 certhash= cf0f5a14b893bdf4f9a0d46b0ce137ba7109d59b appid={00112233-4455-6677-8899-AABBCCDDEEFF}

Import the Server Certificate on the Client (only for self-signed certificate)
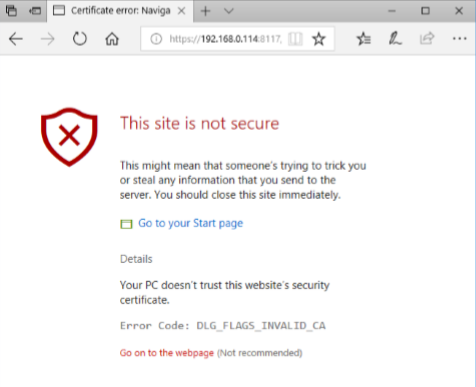
If the certificate is not installed the Client browser displays the following alert
- Copy the server certificate to the client machine.
- In Internet Explorer, Click Tools > Internet Options.
- In the Content tab of the Internet Options screen, click Certificates in the Certificates area.
- The Certificates dialog box is displayed.
-
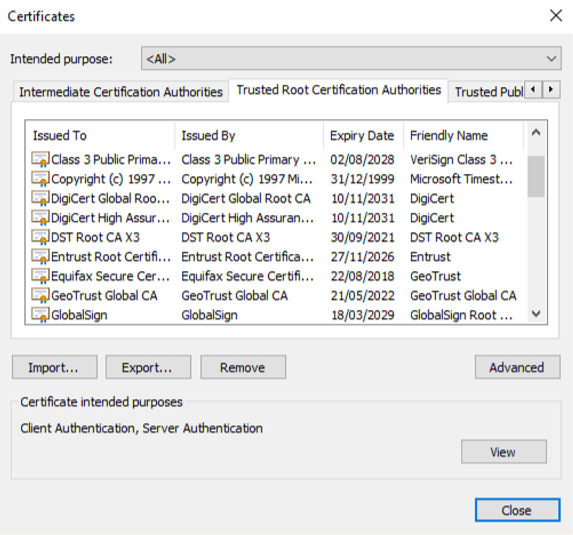
In the Trusted Root Certification Authorities tab, click Import to display the Certificate Import wizard.
- Click Next.
-
In the File to Import screen, click on Browse and select the server certificate file.

- Click Next to view the Certificate Store screen.
- Click Next to view the Finish screen.
- Click Finish to import the certificate into the client machine.